Friday, 13 December 2013

My Move From Windows 8.1 Pro With Media Centre To Ubuntu 13.10 (Part 12)

Ubuntu-1310

In this part I'm going to go into more depth the difference between the Windows 8.1 Pro Desktop and the Ubuntu 13.10 Desktop.

Windows 8.1 Pro Desktop


The Windows 8.1 Pro Desktop is mainly the touch friendly Metro UI Modern UI with the Classic Desktop tacked on for compatibility with 99.99% of the Software out there that doesn't use full screen like Microsoft Office.

The Modern UI is clunky and unwieldy for non touch enabled computers, even though Microsoft re-introduced the Start Button, but this is just a shortcut to the Modern UI Start Screen. Microsoft have introduced the ability to boot straight to the Classic Desktop, but with the Start Menu gone in favour of the Start Screen kind of renders the use of the Classic Desktop useless as you have to ether fill the Taskbar with shortcuts, fill the Desktop with shortcuts or use a third party Launcher such as Object Dock. Even then it's annoying as the Charms bars pop up whenever you mouse over the left ore right side of the Screen.

The Start Screen is cluttered as it doesn't have any kind of organisation out of the box, and Windows 8 and non windows 8 apps are all mixed up on the Start Screen and you have to spend the time sorting your Start Screen how you want it. The only way to get some organization to the Start Screen is to use the All Programs Screen as it has all the Windows 8 apps dumped at the front then all the non Windows 8 Programs grouped by name, making the All Programs Screen kind of a Windows 8 version of the Classic Start Menu.

Ubuntu 13.10 Desktopskbar


The Ubuntu 13.10 Desktop has a slight feel of Mac OSX to it with the Dock Bar running down the left hand side of the Desktop and a menu/Taskbar running across the top.

In Ubuntu 13.10 the Dock Bar is called the Unity Launcher but does the same thing as the Mac OSX Dock Bar by letting you dock apps to it as well as show any open apps that aren't docked, at the There is an equivalent to the Classic Start Menu that is called Dash in Ubuntu.

Dash has a Search box at the top that allows you to search Documents, files and applications as well as online. There is no real organization to the Applications part of Dash, but you can just start typing the name of the application you want and up it pops in Dash, if you don't know the name of the application you want, just type say Music and up pops all of the Music applications you've got installed along with any music files that you've got on your HDD.

The Menu/Taskbar is about 99.99% the same idea as the Mac OSX Menu bar with the exception of the Menu only shows when you mouse over the left hand side of the Taskbar and isn't available on just the Desktop and just says Ubuntu Desktop when all open applications are minimized or no applications are open. The right hand side of the menu/Taskbar is very clean and only shows Keyboard Language, Ubuntu 1 Cloud Service Networking, Battery/power icon a sound drop down with volume slider and mute, clock with a drop down Calendar, an Envelope icon with a drop down list that I'm not 100% sure what it's used for any more as in the pre-Unity Desktop it was used for Email notification as well as Instant Messaging & Social Networking, a Print Que icon when Printing and a Bluetooth icon when you've got a Bluetooth Dongle plugged in or Bluetooth turned on if you've got a Netbook or Laptop with Bluetooth built in switched on.

Other Points


Ubuntu can easily be installed on PC, Mac & even ARM based computers such as Android Tablets where as Windows 8.1 RT is needed to install it on ARM Based Tablets and this isn't readily available other than to OEM's and the Windows 8.1(Pro) isn't as easy to install on a Mac due to having to deal with driver compatibility where as everything should  just work out of the box for Ubuntu on Mac.

Roland

Previous

Google+

Sunday, 8 December 2013

My Move From Windows 8.1 Pro With Media Centre To Ubuntu 13.10 (Part 11)

Ubuntu-1310

In this part I'll talk about Software Development on Ubuntu 13.10. There are loads of different Development tools available for linux that range from the nano code editor that comes with Ubuntu 13.10 and is accessed from the Linux Terminal to full IDE's. In this part I'll be focusing on the Qt Creator IDE with the Ubuntu SDK Plugin installed.

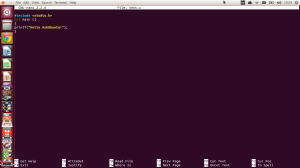
nanoTheGNU nano Code Editor


Development Credentials


I'm not a Developer or even proficient at writing any form of code be it Python or even html, and I've not even had a look at the Markdown code that has been introduced on Wordpress & my only dive into the Code Editor on Wordpress is to add my Google+ Profile badge to the end of every post, & even then I just copy and past the Code.

By now you may be wondering what the hell am I doing writing an Article on something like a Programming IDE when I'm not a Programmer or even have any proficiency in writing code. Well I've been interested in Coding since Microsoft introduced Visual Studio Express, but never could workout how to do anything with it. I then tried Python earlier in the year with a Tutorial that I got from a Linux Magazine and got the hang of Python fairly quick, but then gave up after I was unable to get one of the tutorials to compile (think I was using on of the Ubuntu 13.04 Development releases at the time) & ended up giving up.

I've now decided to try and pick up learning to Code again, probably when this series has finished so I can then move onto a new Coding series and not have to switch back and forth between to series and have more time to dedicate to learning to Code.

Qt Creator & Ubuntu SDK


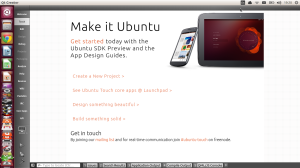
The Qt Creator IDE is very slick and easy to understand as you are talked through the steps of creating a new Project and get to select where files e.t.c. go, and you are then presented with a slick and minimalistic Code Editor that isn't full of  multiple panes, toolboxes, icons and when using the Global Menu option in Unity you're not overwhelmed by having the Menu Bar on display all the time.

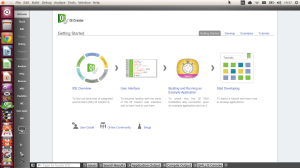
Qt Creator Start ScreenThe start screen of Qt Creator with the Ubuntu SDK in is minimalistic compared to that of Microsoft Visual Studio & the Welcome option on the top of the left hand menu panel even has a Tutorials option (which I might have to investigate when I'm starting the next series & actually learning how to Code).

Welcom Screen

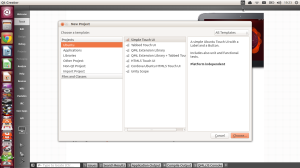
The New Project Screen lists all the different projects in the left hand list with all the different options for the selected project type on the right. This layout makes it simple to see what you can do with each project type without having to select a project type to move onto a window listing the options which makes it easy at a glance to know which project type to choose for what you want to create.

New Project

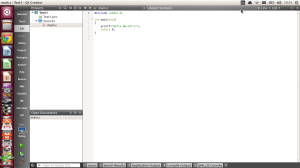
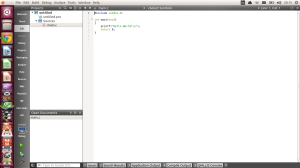
The Code Editor window is minimalistic with the IDE's options menu on the left hand side showing up from the Start Screen, then the Projects file Tree panel above the Open Document window with the Code Editor panel taking up the rest of the Screen with that being it for the Code Editor.

Code Editor

The IDE Menu is absent from Qt Creator when Using Unity Global Menu, but if you have got Unity Global Menu switched off or using KDE or Gnome Desktops the Menu will be permanently attached to Qt Creator.

Qt Creator Menu

I personally like how tidy the Unity Global Menu keeps everything by hiding the Application Menu so I only see the Qt Creator Menu when I mouse over the Unity Panel.

Conclusion


Qt Creator is probably one of the best designed Development Environments I've seen and I look forward to getting to know it more and document more about it. The Ubuntu SDK for Qt Creator is an added bonus and I can see being very useful.

Roland

Next      Previous

Google+

Saturday, 7 December 2013

My Move From Windows 8.1 Pro With Media Centre To Ubuntu 13.10 (Part 10)

Ubuntu-1310 In this part I'll conclude the Video Editing and Scree Capture series with Web Cam Video Capture, and talk about two Web Cam tools I've got installed, Cheese Webcam Booth & GTK UVC video viewer.

Cheese Webcam Booth


Cheese Webcam Booth is a simple Webcam video recorder & photo taking app. Cheese is ideal for recording videos & taking photos only and has a number of video & photo effects and has a burst photo mode, but if you want to overlay video onto a Screen Recorder session then its not ideal as it has got a UI that shows all the options & time stamp for video recording.

GTK UVC video viewer


GTK UVC video viewr is a better option for working with Webcam video as it has a separate Video window & tools meaning that you can use it to record video from your Webcam, take pictures with your Webcam or just minimize the controls window and have the video window open during a Screen Recorder Session that you can have Webcam footage showing while showing the applications etc, this is ideal for making video tutorials or OS reviews. GTK UVC video viewr is the most flexible and powerful of the two Webcam tools that I've talked about here and I've not had a play with GTK UCV video viewr so I'm not sure what it's fully capable of.

Conclusion


The probably the easiest & most powerful selection of tools has to be:

  1. Kazam for Screen Recording & Screenshot taking.

  2. GTK UVC video viewer for working with a Webcam.

  3. HandBrake for Video Conversion.

  4. KdenLive for video editing.


With the 4 tools I've mentioned in the list  above you'll be able to do pretty much anything for YouTube or any other distribution way you want. As I mentioned at the end of the last part YouTube is your best bet in learning everything that you could possibly need to use the above tools to their full potential

Roland

Next       Previous

Google+

Friday, 6 December 2013

My Move From Windows 8.1 Pro With Media Centre To Ubuntu 13.10 (Part 9)

Ubuntu-1310

In this part I'll be talking about Screen Recording, Video Conversion & Video Editing, and in Part 10 I'll be talking about Web Cam Software that's ideal for doing YouTube OS Reviews or even YouTube or even Offline Tutorials.

Screen Recording


There are various Screen Recorders for Linux, but the one that I chose to Download and Install was Kazam and for Ubuntu users Kazam is available in the Ubuntu Software Centre.

Kazam allows you to record your Desktop Session which is ideal for producing OS Reviews or Tutorials, the only downside is that if you don't require any edits to your recorded Desktop Session you will have to run it through ether a Video Editor or Video Converter to be able to use the raw video as is. On a plus note though Kazam allows for Screenshot Capture which is ideal for YouTube producers that want to create a Thumbnail for their OS Review or Tutorial.

Video Conversion


The Video Converter that I've Installed is HandBrake, the only thing is that it's not available to Install from the Ubuntu software Centre and the only place to get it is from here.

HandBrake is a pretty straight forward piece of software and does the conversions pretty quick, but speeds will depend on the size of the video being copied so don't expect say a full HD Video with Full 5.1 Surround with a length of an eposode of Game Of Thrones to convert as quick as a 10-20 min Video captured using an iPhone or Samsung Galaxy S4 that's High Quality SD or even 720p HD.

Also the more resources you've got will speed up the Conversion an 8 Core 64 Bit AMD CPU with 32GB of Matched RAM will fly compared to a Single Core 64 Bit intel Celeron CPU with 3GB of RAM.

Video Editing


I've Downloaded KdenLive from the Ubuntu Software Centre as two YouTube producers that use Linux & produce Linux OS Reviews also use it, so it can't be that bad.

KdenLive has a pretty simple but functional Layout with the top half of the screen split between a video & audio clip library on the left & preview window on the right, while the bottom is taken up by a multi track timeline.

I've not had chance to have a play with KdenLive much yet so can't really go into too much depth with all the features of KdenLive at this time.

Another good Video Editor is Lightworks by Red Shark. I've had a bit of a play with Lightworks when I last used Linux, but I might have to give it a go again in the future.

Lightworks is a Professional Video Editor with lots of powerful features that are probably beyond the knowledge or even use of most people unless they have got experience in using Adobe Premier Pro or Adobe After Effects as they are both Industry Standard Video Editors (Windows & Mac OSX only). Lightworks is currently only available on Windows & Linux with a Mac OSX version in development.

Note


I've not had much of a chance to play with ether HandBrake, KdenLive or Lightworks, but as soon as I've had a chance to have a play with them I'll post an in-depth review on them. Kazam on the other hand is so simple to use that the review would be to short to be of any use as the UI is basically self explanatory.

In the meantime a YouTube search on the software mentioned in this part will probably bring up video reviews and tutorials that will help.

Roland

Next        Previous

Google+

Thursday, 5 December 2013

My Move From Windows 8.1 Pro With Media Centre To Ubuntu 13.10 (Part 8)

Ubuntu-1310

In this part I'll talk about gaming & mainly about more main steam gaming via the Steam Distribution Platform in particular all though a couple of the game also distribute via the Game Developers own website as well as via Steam.

There is a multitude of games that are available via the Ubuntu Software Centre and most can be Installed as Default in OpenSuse. I've got three Installed on my Ubuntu Laptop that I downloaded from the Ubuntu Software Centre, these are SuperTux & SuperTux 2 that are based on the classic side scrolling Platform Game Super Mario Bros & Super Mario Bros 2 and the third is SuperTuxKart which is based on the original Super Mario Kart (I think).

Gaming On Linux Using Steam


Even though I've got 7 Games with Linux versions on my Steam Account I've currently only got 1 game from my Steam Library currently installed at the minute & that's my current favourite game Euro Truck Simulator 2 by SCS Software. Apart from it being an addictive game by taking the Driving Simulator out of the Racing genre (but that's for a different part or Article) I needed a game with Steering Wheel support for an earlier part on Hardware Support in Linux.

There is only three other indie games that I've go:

  • Bastion that is like a fantasy Platform game that I got via the Humble Bundle Weekly Sale.

  • Game Dev Tycoon  that I got when I was using Windows 8. If you are using Linux already then I'd highly recommend getting games via Steam if they are available via Steam as I had all kinds of trouble getting the Ubuntu package of Game Dev Tycoon to Install when It was made available for Linux, and in the end just gave up and Installed the Windows version using Play On Linux (but that ended up with sound issues) fortunately the last time I was on Windows 8 I spotted a link in the game to upgrade to a Steam License which I did.

  • Kerbal Space Program when I last moved to Ubuntu. Kerbal Space Program on the other hand doesn't allow for the upgrading of a License to Steam. Kerbal Space Program offers the choice to Download an Installer Version on Windows & Mac, but that  neater solution isn't available which only leaves the Steam Version as the neater and easier option  (which I'm going to have to re purchase through Steam at some point).


I've then got the Valve Produced HalfLife 2 & Addons and Counter Strike Source from years ago in my Library that I got years ago that doesn't work properly on my Laptop & the rest of my Steam Library is made up of Windows only games.

I've also got a vast Library of games on the Origin Distribution Platform that I'm unable to use for two reasons:

  1. Origin isn't available for Linux.

  2. If Origin was available for Linux it would then have to rely on the game Developers getting behind Linux, which is going to take time as Steam has still got gaps in it's vast Library of games that have also got Linux versions.


Conclusion


Gaming on Linux is slowly starting to gather steam as indie developers are starting to get behind Linux as well as Windows & Mac and when one of the biggest Developers Valve gets behind Linux by releasing HalfLife 2 and Steam for Linux the whole Gaming industry should take notice of Linux.

The forthcoming Linux based Steam OS Gaming platform developed by Valve should be a big game changer for Linux as it will offer far more than the proprietary OS's used by Sony in the Playstation, Nintendo in the Wii & Microsoft in the Xbox, also with Steam OS being Free & Open Source it means that  anyone will be able to build their own Steam OS powered Console as well as OEM's and presumably Valve building their own Steam OS based Console to rival the established Console's.

Linux maybe slowly moving out of the niche market to main stream, especially when it can support Hardware that will technically reach  End Of Life for Windows in about 2 or 3 versions of Windows due to Hardware requirements of newer versions of Windows, and will be totally End Of Life once the last version of Windows that runs fine once Microsoft stops all Support for it.

Microsoft then expects users to ether upgrade Hardware where possible or buy a new Computer with Windows pre-installed. Why a user should seriously consider purchasing a new Computer with the Latest version of Windows on when they can just Install the latest version of Linux on it is beyond me.

Roland

Next           Previous

Google+

Wednesday, 4 December 2013

My Move From Windows 8.1 Pro With Media Centre To Ubuntu 13.10 (Part 7)

Ubuntu-1310

In this part I go through some of the hardware that's advertised as Windows or Windows/Mac only that works in Ubuntu Linux & presumably in other Linux distributions.

Hardware Known To Be Working


  • Kodak ESP 1.2 AIO Printer, the Printer side of the Kodak ESP 1.2 definitely works under Ubuntu 13.10, but the Printer Driver that needs to be used is the Kodak Hero 3.1 AiO one.

  • Microsoft LifeChat LX-2000 Headset, the Headset works as it's a simple Headset with 3.5mm Headphone Jacks for the Microphone & the Headphones.

  • Generic Wireless Lazar Mouse, as with all mice a generic Wireless Lazar Mouse works out of the box without needing any drivers.

  • Kodak ESP 1.2 AIO Printer Photocopier, the Photocopier portion of the Kodak ESP 1.2 AIO Printer works as it employs an internal interface between the Flatbed Scanner & the Printer for Photocopying.

  • Microsoft LifeChat LX-3000 USB Headset works perfectly fine once the LX-3000 Headphones & Microphone are selected in Sound Settings.

  • Generic USB Webcam with Microphone, the Webcam works fine even the 6 LED lights can be turned on and off. The Microphone works fine as it uses a separate Microphone cable with 3.5mm Jack.

  • Thrustmaster Ferrari Challenge Wheel works with no problems or additional software required.


Hardware Unknown If Working Or Not


  • Kodak ESP 1.2 AIO Printer Scanner, I don't tend to do any Scanning so I'm not sure if the Scannin side of the Printer works or not.


Not Working


I've so far not come across any Hardware that's not working.

Roland

Next     Previous

Google+

Tuesday, 3 December 2013

My Move From Windows 8.1 Pro With Media Centre To Ubuntu 13.10 (Part 6)

Ubuntu-1310

Since I started my transition from Windows 8.1 Pro with Media Centre last Wednesday I thought I'd try the Linux alternative to Myth TV. In this part I document my brief encounter with Myth TV.

MythTV_logo2

Myth TV is the Linux alternative to Windows Media Centre, but it's far more powerful than Windows Media Centre, & with all the extra power and features it makes it more complex to setup. I found this oout the hard way when I tried to set it up yesterday evening.

Unlike Windows Media Centre MythTV is split into two separate parts:

  • Part 1 is the Backend that can be thought of as a Server (and I guess in some way it is a Server) this means that you can setup the MythTV Backend & presumably the TV receiving Hardware & then put it in a Cupboard or in a Loft out of the way as long as you've got an Ethernet Connection to your Network where you have got the MythTV Backend machine.

  • Part 2 is the Frontend, the Frontend is the UI of MythTV, this can be setup on another Machine and placed in your living room, bedroom, kitchen or Home Theater room and act as a Set Top Box. The Frontend can also be setup on your Laptop or Desktop Computer as well.


MythTV can have both the Backend & Frontend, this method is probably going to be the most common way of setting up MythTV as it's the cheapest method as it only needs one Computer. The HTPC method is probably one of the easiest routes to go as it doesn't require a Backend Server & separate Frontend STB to work, which is in keeping with how Windows Media Centre works.

ab_mythbuntu_small

If you're building a dedicated MythTV HTPC the you can't go wrong with MythUbuntu. Mythubuntu combines a stripped down veersion of XUbuntu with MythTV and can be used as Both an All In One Ubuntu HTPC or as a separate MythTV Server & separate MythTV STB. MythUbuntu also allows you to try out the MythTV Client Server model by having a MythUbuntu Computer & using the MythUbuntu Disk to boot any Desktop or Laptop into the MythUbuntu Frontend, this is ideal if you want to try out the Client Server model of MythTV/MythUbuntu without having to install it onto you existing Windows Media Centre HTPC.

MythTV_logo2

I installed MythTV from the Ubuntu Software Centre & instantly found out the hard way that MythTV is a complex beast, but with all the power of MythTV it wouldn't be able to have the Client Server model that it does.

Once installed I went into the MythTV Backend setup and couldn't get past the first 3 dialogues before it went back to the beginning after 3 attempts with the Backend setup I tried the Frontend setup and got the same result, but this time with a constant Unity Notification that MythTV had restarted & no amount of Quitting MythTV would stop it from re-starting, and I was forced to unlock MythTV from the Unity Dock & Uninstall MythTV to be able to have a working Laptop back.

On reflection of my brief experience with MythTV maybe I should have gone to the MythTV website and downloaded the pdf version of the MythTV documentation to actually find out what I was supposed to be actually doing to correctly setup MythTV.

In no way is my brief experience with MythTV a knock on what I'm sure is an excellent Media Centre service, but compared to the ease of use of Windows Media Centre (Microsoft have done an excellent job of making Media Centre mimic as close as they possibly can the Firmware on a Consumer DVR STB whilst taking into account the extra power that a HTPC has over a traditional DVR STB.

I'll definitely give MythTV another look, but this time I'll use the MythTV Documentation to assist me in setting it up, and it'll make for another article in the future, maybe part 10 or 11 maybe eariler than that depending on how much free time I've got later this week to dedicate to having a concentrated attempt at setting it up.

Roland

Next          Previous

Google+

Advertisement

BBC News - Sheffield & South Yorkshire